How to carry out a health check of your roof
30/07/2018
Homeowners are using this particularly hot summer as a brilliant opportunity to carry out a health check of their roof. In many ways, it’s perfect – it’s bright, clear and dry, which mitigates a number of safety concerns normally associated with winter. This doesn’t mean it’s completely without risk, though, so in this post we’re going to be taking you through the main stages, step-by-step.
Inspecting it from the inside
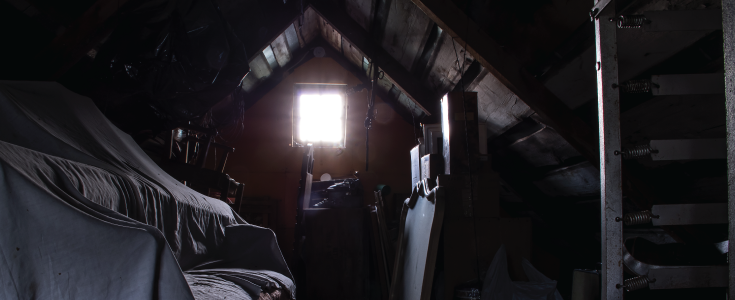
If you really want to carry out a thorough health check of your roof, it’s best to start from the inside, in your attic. (If you’ve got no way of getting up to your attic, here at Browns Ladders we offer an excellent selection of loft ladders for that very purpose.) Once you’re up there, what you’ll be looking out for is any signs of sagging, water rings, dark patches, or even sunlight shining through – a clear sign of gaps in the material!

(Obviously, the light’s coming from an actual window in that picture, but yet get the idea.) You’ll also want to look at ventilation. Poorly ventilated attics can lead to moisture build-ups and condensation, which damage your roof from the inside. Look through your vents for any blockages, carefully remove any you find. Of course, if you’ve got the know-how you may have the confidence to tackle these issues for yourself. On the other hand, you may wish to speak to a roofing expert. When it comes to roofs, we’d certainly never recommend attempting to tackle any job you weren’t supremely confident with! This is especially true when it comes to the roof exterior, which we’ll move onto now.
Be extremely careful on roof exteriors
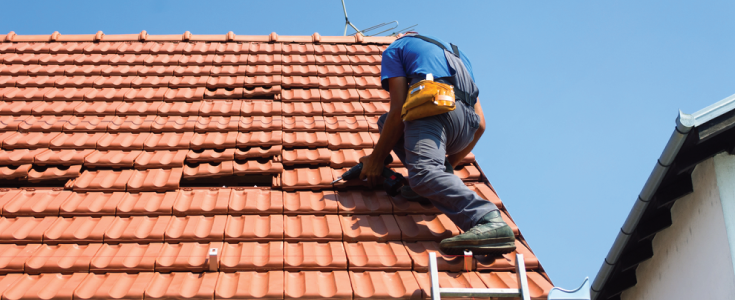
Loose and damaged tiles are a particular danger on roofs, and one of the first things you’ll likely be looking for once you’re up there. However, to get up there safely, we’d recommend:
- A proper extension ladder, or preferably a roof ladder
- A recently-tested safety harness
- A 700kg strain rope
- Wearing soft-soled boots with decent grip
To be honest, roof ladders are preferable when it comes to this sort of work, given that it’s what they’ve been specifically designed for. The ridge hook guarantees a safe connection to the roof, offering you extra security and stability as you ascend. Our Lyte Aluminium Single Section Roof Ladders are suitably for many tradesmen and professionals, and so likely more than sufficient for DIY work.
When setting up your ladder:
- Make sure you keep it away from power cables, and not in front of doors
- Ensure that it’s absolutely stable and secure before you place your foot on a single rung
- Clear your working area, and ensure that nobody is likely to wander into any areas where there’s a danger of something falling and striking them

Dealing with loose or damaged roof tiles
To remove a damaged tile, temporarily (and carefully) remove the tiles above the broken one, and set them to one side for a moment. Then, taking care to make sure you remain stable throughout, carefully prise off the one that needs replacing, and remove the nails underneath. Attach a replacement tile to the roof, coat it generously with sealant, and leave it to dry. Again, if you don’t have the best equipment or you’re not 100% comfortable with doing the job, we’d recommend leaving it for a professional!
Check the flashing
You may have seen flashing before, even if you didn’t recognise it at the time. Essentially, flashing is the term used to refer to the metal strips that seal chimneys, skylights, vents, satellite dishes and other objects atop the roof. Flashing can be damaged in bad weather, so if you know what you’re doing it might be worth checking it while you’re up there. Make sure it sits flush against the roof, with no gaps where water can seep in under it. Flashing can slip over time, so check to ensure this hasn’t happened, and replace any bits that are rusty. You can find replacement flashing (and useful silicone) in most high street DIY shops. If any sealing caulk has cracked, replace it with new, waterproof silicone sealant.
Other useful rooftop jobs
While you’ve got your roof ladder deployed, an easy job is to take a quick look at your guttering, and check that it’s doing its job as it’s supposed to. In many ways, summer is the best time for this job. It’s much less pleasant and convenient in the dark and wet of winter! Make sure nothing is sagging, holed or blocked. If you find a blockage of dead leaves or something similar, most of the time all it takes to clear it is a couple of pokes with the end of a broom. However, make sure not to over-stretch on your ladder – always keep your hips within the ladder’s guardrails!

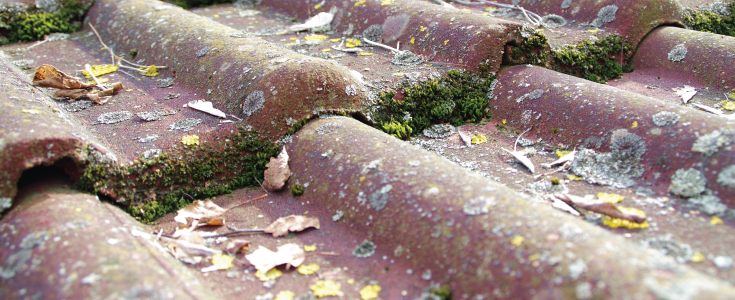
Moss is another good thing to check for once you’re up there. It might look harmless, but it can cause significant moisture damage to roof tiles and wood, neither of which bode particularly well for your roof. What’s more, it can spread especially quickly in summer. The current heatwave gives you a great opportunity to remove moss, as it’s at is most vulnerable during a long, dry spell. Once again, if you have any doubts or you’re not comfortable in doing so, definitely speak to a roofing expert.
Whether you’re a professional tradesperson with plenty of experience, or simply an enthusiastic homeowner, you’ll find a huge array of useful access equipment right here on our site at Browns Ladders. As well as hardy extension ladders such as our Lyte DIY Double Extension Ladders, you’ll also find reliable roof ladders such as our Chase Industrial Aluminium Single Section Roof Ladders. Feel free to take a closer look around our site, or alternatively give us a call on 01282 615517!